Under-Desk Cable Management Trays for Small Desks: Check Mounting Method, Power Strip Fit, and Leg Clearance Before You Buy
An under-desk cable management tray can look like a simple cleanup accessory.
Move the power strip and loose cables off the floor, tuck them below the desktop, and the desk looks cleaner.
But on a small desk, the real buying problem is not whether a tray can hold cables.
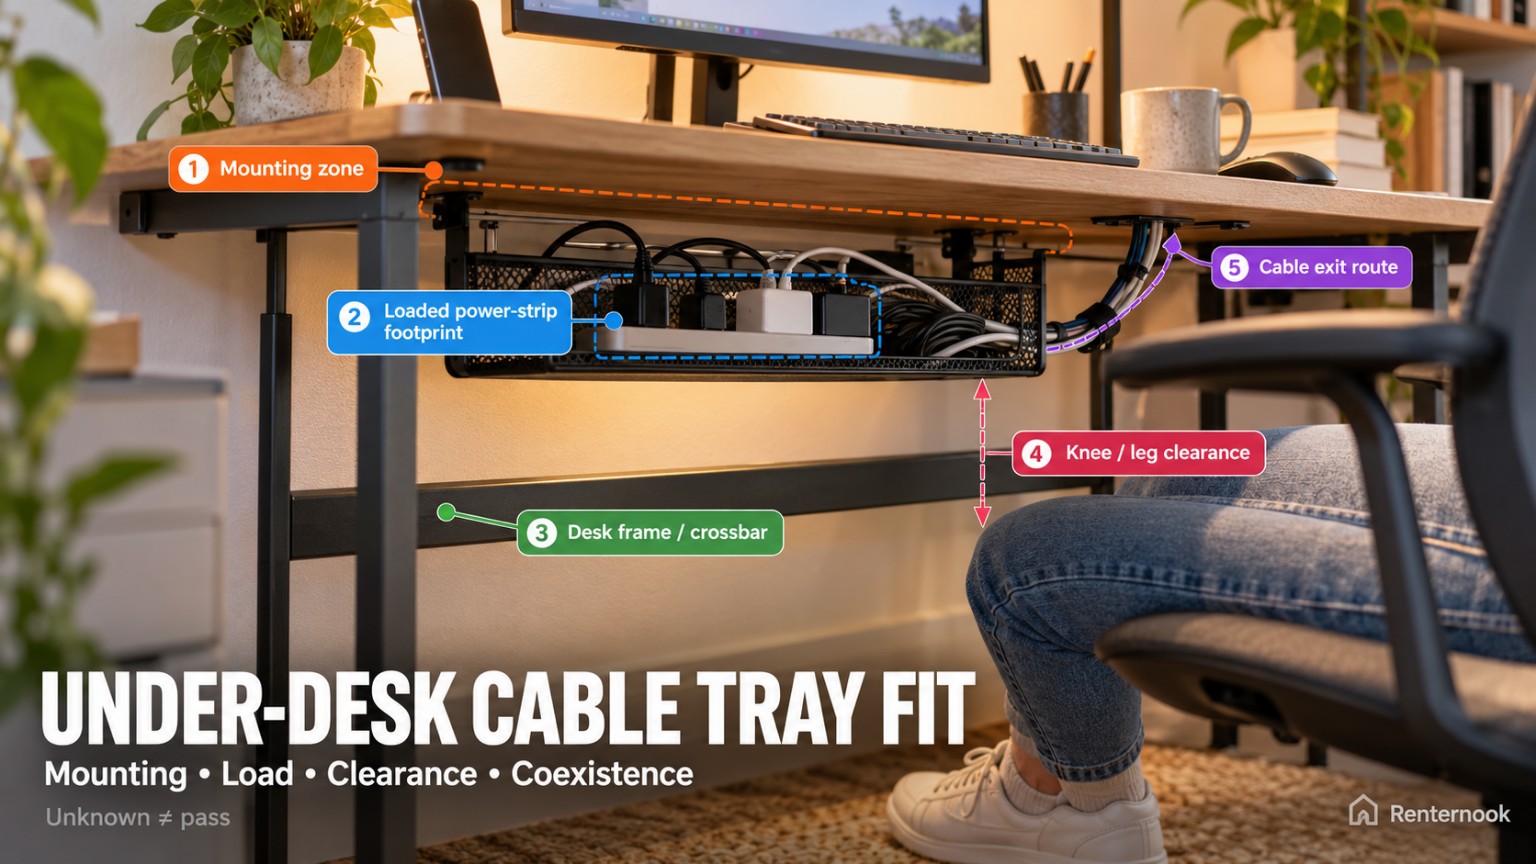
The tray has to fit the exact underside of the desk, use a mounting method the desk can support, clear the frame and other hardware, hold the actual power strip and cable bundle, stay out of the user’s leg space, and coexist with everything else already attached below the desk.
That creates the Fit-First rule for this guide:
Cable capacity does not automatically prove installation fit. Installation fit does not automatically prove working clearance.
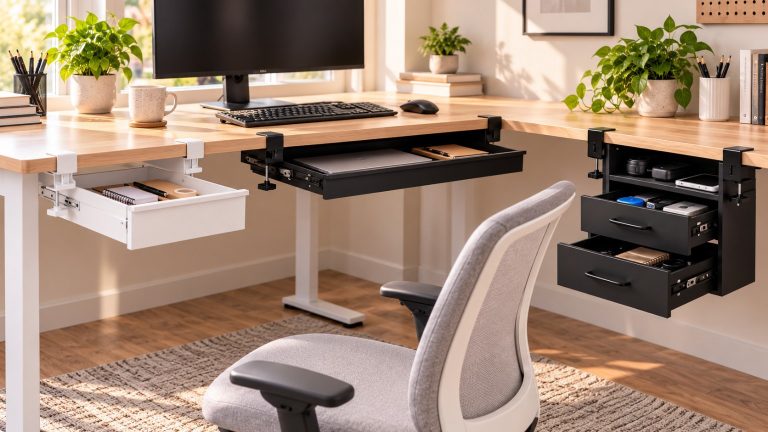
A tray can be wide enough for a power strip and still fail because the clamp zone is blocked by a desk frame. A screw-mounted tray can fit the available width and still be a poor choice if the desk material, fastener engagement, or pilot-hole requirement is not verified. A clamp-on tray can attach securely and still occupy the same under-desk space needed by a keyboard tray, drawer, monitor-arm clamp, crossbar, or the user’s knees.
This guide compares four product roles:
- VIVO DESK-CM6L-B — rigid steel clamp-on role
- VIVO DESK-AC16F-C — flexible fabric clamp-on role with two height settings
- VIVO DESK-AC06-1C — screw-mounted metal tray role
- IKEA FÖRSÄSONG 005.731.88 — compact clamp-on role
They are not ranked from best to worst.
The purpose is to show how different mounting methods, tray geometries, and under-desk drops change what a small-desk buyer needs to verify before buying.
Renternook did not physically test these products. Product-specific dimensions and installation claims in this guide are based on the first-party manufacturer sources reviewed for this guide. Recheck the current product page, selected variant, desk structure, and installation instructions before buying.
Start With the Desk Underside, Not the Cable Tray
The easiest mistake is starting with the tray listing and asking whether the dimensions look compact.
Start under the desk instead.
Look at the exact zone where the tray would need to live.
Record:
- desktop thickness at the intended mounting point;
- desk material and construction;
- front, rear, and side edge geometry;
- aprons, metal rails, crossbars, braces, drawers, control boxes, or shelves below the top;
- keyboard tray hardware;
- monitor-arm clamps and their lower clamp plates;
- cable baskets, power strips, hooks, and accessories already installed;
- the user’s knee and thigh space;
- the route cables need to take to the wall outlet, dock, monitor, laptop, or desktop PC.
A clear-looking desktop can hide a crowded underside.
For an under-desk cable tray, that hidden structure is the real installation environment.
The 9-Part Under-Desk Cable-Tray Fit Check
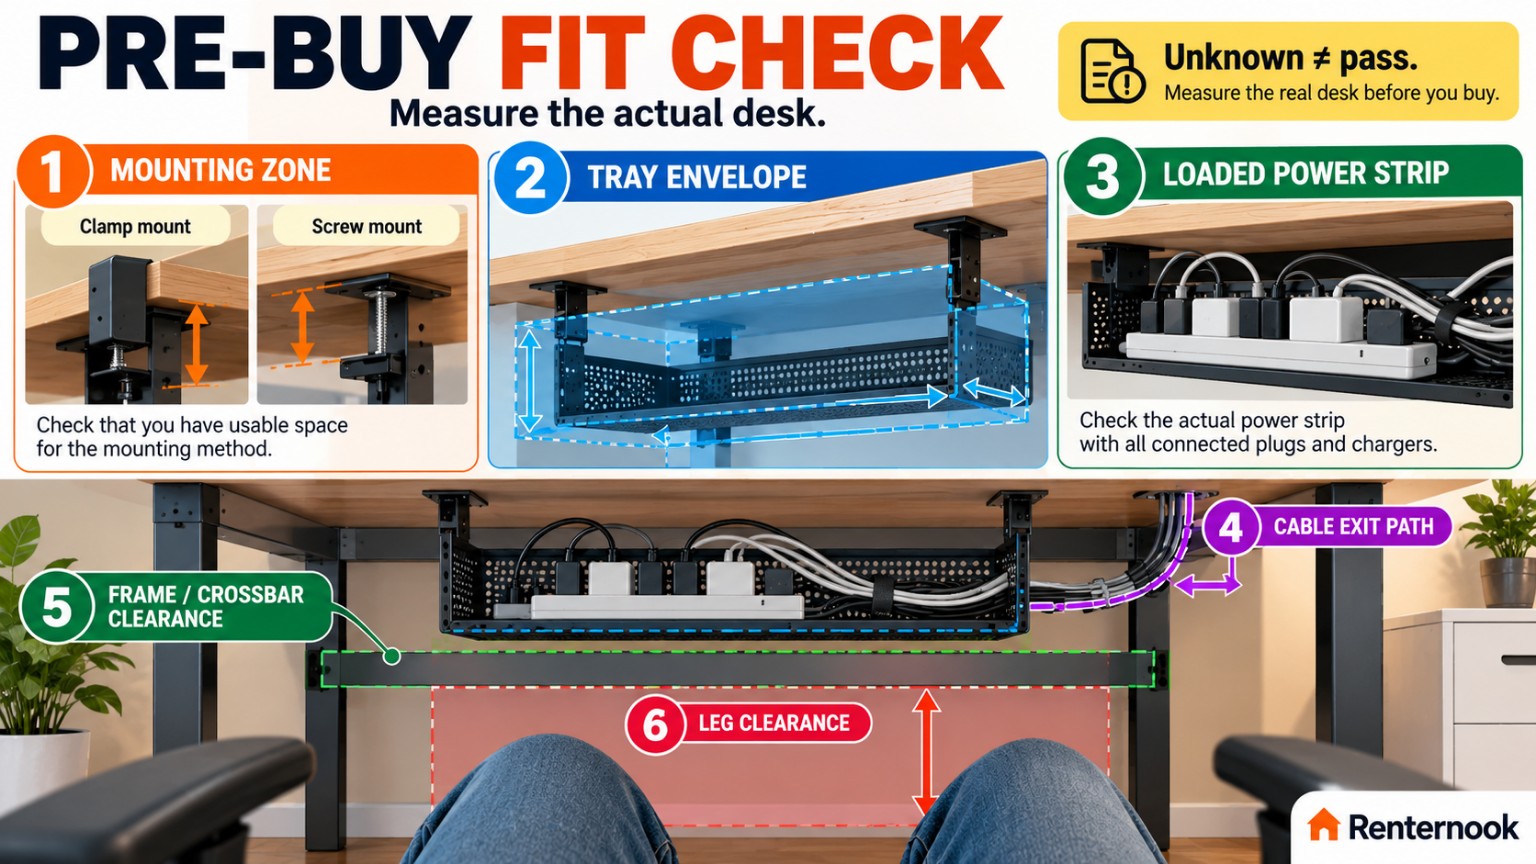
Before comparing products, separate the buying decision into nine checks.
1. Choose the mounting method first
The products compared in this guide use two different mounting architectures:
- clamp-on — VIVO DESK-CM6L-B, VIVO DESK-AC16F-C, and IKEA FÖRSÄSONG;
- screw-mounted — VIVO DESK-AC06-1C.
These are different buyer decisions.
A clamp-on tray needs a usable desk edge, enough desktop thickness compatibility, and a clear clamp zone above and below the top.
A screw-mounted tray needs a desk construction the manufacturer supports plus an installation location where the fasteners can engage correctly.
Do not treat “under-desk” as one universal installation type.
2. Check desktop thickness and desk construction
For the clamp-on products, compare the exact desktop thickness at the intended clamp location with the published range.
Reviewed manufacturer information:
- VIVO DESK-CM6L-B: 0.2–2 inches;
- VIVO DESK-AC16F-C: 0.4–2 inches;
- IKEA FÖRSÄSONG: 5/8–1 5/8 inches.
For VIVO DESK-AC06-1C, the manufacturer-stated supported desk materials in the reviewed source set are wood or particle board / MDF.
A numeric desktop-thickness limit for this selected screw-mounted variant is unknown in the reviewed manufacturer information.
Do not invent one.
A desk being made from a listed material also does not prove that every location on that desk is suitable for screws.
3. Reserve the clamp or fastener zone
The tray needs more than empty width.
For a clamp-on tray, inspect the exact clamp locations for:
- desk aprons;
- steel frames;
- support rails;
- drawer boxes;
- standing-desk controls;
- cable baskets;
- other clamps;
- decorative lips or bevels;
- nearby legs or brackets.
For a screw-mounted tray, inspect the fastener line for:
- sufficient material where the screws need to engage;
- hidden hardware;
- edge proximity;
- crossbars or rails;
- conflicting holes or existing accessories.
The exact clamp installation zone, pilot-hole requirement, and fastener engagement remain product- and desk-specific where the reviewed manufacturer information does not establish them.
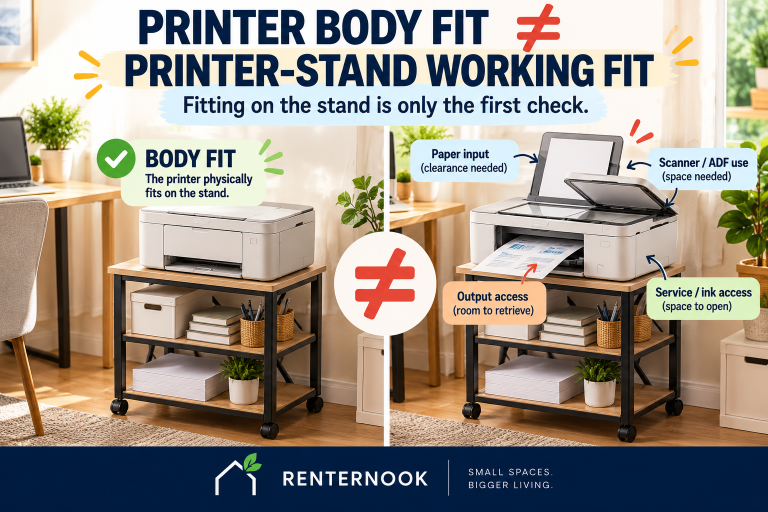
4. Measure the actual power strip, not just the tray
A cable tray is often bought mainly to hold a power strip.
Measure the actual strip you plan to place in it.
Record:
- length;
- width;
- body height;
- plug orientation;
- transformer or power-brick size;
- switch location;
- surge-protection indicator or reset access if applicable;
- cord exit direction.
Then compare those dimensions with the usable tray space.
Do not use outer tray dimensions as proof of power-strip fit.
The published product dimensions describe the tray or assembly. They do not establish universal compatibility with every power strip, adapter block, or plug arrangement.
5. Estimate cable volume and cable exit paths
Cable management is a volume-and-route problem, not only a weight problem.
Check the actual bundle:
- power cord;
- display cables;
- USB or Thunderbolt cables;
- laptop charger;
- monitor power adapters;
- dock power supply;
- Ethernet;
- extension leads;
- excess cable loops.
Then identify where those cables need to leave the tray.
A tray can physically hold the bundle but still create a poor setup if plugs are crushed together, cable bends become too tight, or the egress path is blocked by the desk frame.
This guide does not make unsupported electrical-safety claims. Follow the electrical device manufacturer’s instructions and do not treat a cable tray’s mechanical load rating as an electrical rating.
6. Check the under-desk drop
Every tray occupies vertical space below the desktop.
That drop matters on a small desk because the same volume may already be needed by the user’s knees, thighs, chair arms, drawers, or a keyboard tray.
The examples below show different vertical architectures:
- VIVO DESK-CM6L-B: published overall dimensions are 17 × 6 × 5.8 inches, with 8.8 inches including clamps as published;
- VIVO DESK-AC16F-C: tray dimensions are 15.7 × 5.5 × 5 inches; total dimensions are published as 15.7 × 6 × 8.75 or 9.75 inches, with two height settings and published under-desk clearance of 6.25–9.25 inches;
- IKEA FÖRSÄSONG: published size is 15 inches wide × 4.25 inches deep × 6.75 inches high;
- VIVO DESK-AC06-1C: published dimensions are 16.5 × 3 × 4.5 inches.
Those figures are useful for planning, but they do not prove the final drop in the buyer’s exact setup.
7. Check leg and chair clearance
The buyer needs to sit at the desk after the tray is installed.
Check:
- knee position;
- thigh clearance;
- chair height;
- chair arms;
- where the user sits relative to the tray;
- whether the tray is centered or offset;
- whether the power strip or plugs hang below the tray;
- whether cables create a secondary obstruction.
A tray can pass installation fit and still fail daily use if it occupies the user’s movement envelope.
No product in this guide gets a universal leg-clearance claim.
8. Check coexistence with other under-desk hardware
This is a major collision point for under-desk cable-management trays.
An under-desk cable tray may need to share the same physical zone with:
- a keyboard tray;
- desk frame or crossbar;
- drawer;
- monitor-arm clamp;
- power-control box;
- standing-desk motor hardware;
- headphone hook;
- bag hook;
- CPU holder;
- another cable-management device.
This guide does not assume that accessories coexist simply because they each fit the desk individually.
The buyer must map the underside as one system.
9. Verify the full working state
Only after the first eight checks should the buyer decide whether the tray is a qualified candidate.
The final question is not:
“Can I attach this tray?”
It is:
“Can I attach it, load the actual power strip and cable bundle, route the plugs and cords, keep the desk hardware clear, and still use the desk normally?”
That is the difference between accessory fit and working fit.
Quick Comparison: Four Under-Desk Cable-Tray Roles
| Product | Product role | Mounting | Published desk boundary | Published tray / assembly dimensions | Published load | Main buyer question |
|---|---|---|---|---|---|---|
| VIVO DESK-CM6L-B | Rigid steel clamp-on | Clamp-on | 0.2–2 in desktop thickness | 17 × 6 × 5.8 in; 8.8 in including clamps as published | 11 lb | Does the rigid tray and clamp system fit the desk edge and available drop? |
| VIVO DESK-AC16F-C | Flexible fabric clamp-on / height settings | Clamp-on | 0.4–2 in desktop thickness | Tray 15.7 × 5.5 × 5 in; total 15.7 × 6 × 8.75 or 9.75 in | 11 lb | Which of the two height settings works with the real underside and leg space? |
| VIVO DESK-AC06-1C | Screw-mounted metal tray | Screw-mounted | Wood or particle board / MDF stated; numeric thickness limit unknown | 16.5 × 3 × 4.5 in; mounting holes 11 in apart | 11 lb | Is the desk construction and exact fastener zone suitable for the selected screw-mounted variant? |
| IKEA FÖRSÄSONG 005.731.88 | Compact clamp-on | Clamp-on | 5/8–1 5/8 in desktop thickness | 15 × 4.25 × 6.75 in | 7 lb | Does the smaller published footprint solve the real clamp, power-strip, and clearance problem? |
This table is not a ranking.
Each product exposes a different fit problem.
Unknown does not mean zero, pass, or fail.
1. VIVO DESK-CM6L-B — Rigid Steel Clamp-On Role
Official product page: https://vivo-us.com/products/desk-cm6l-b
What This Role Adds
The DESK-CM6L-B is the rigid clamp-on role in this comparison.
Manufacturer-published facts include:
- mounting: clamp-on;
- material: steel;
- compatible desktop thickness: 0.2–2 inches;
- dimensions: 17 × 6 × 5.8 inches;
- published dimension including clamps: 8.8 inches;
- weight capacity: 11 lb;
- safety lip: 2 inches.
The rigid steel structure gives the buyer a clearly defined tray geometry to compare with the underside of the desk.
That geometry still has to pass the real desk check.
Check the clamp zone before the tray body
The published 0.2–2-inch desktop-thickness range is only one gate.
A desk can fall inside that range and still fail because the clamp location is blocked by:
- a metal desk frame;
- a rear or front apron;
- drawer hardware;
- a cable basket already installed;
- a monitor-arm clamp using the same edge;
- a support rail under the top.
Do not measure a random part of the desk.
Measure the exact location where the clamps need to sit.
Treat 17 × 6 × 5.8 inches as a planning envelope, not a power-strip guarantee
The tray’s published dimensions help the buyer estimate space.
They do not prove that every power strip under 17 inches long will fit.
The actual usable space can depend on:
- tray wall geometry;
- safety lip;
- plug body size;
- transformer blocks;
- cable bend direction;
- how cables enter and leave the tray.
Measure the power strip and its connected plugs as a system.
Mechanical capacity is not an electrical rating
The manufacturer-published capacity is 11 lb.
That is relevant to the mechanical load placed in the tray.
Do not treat it as evidence about surge protection, current capacity, heat management, electrical safety, or the suitability of a particular power strip.
Those questions belong to the electrical devices and their manufacturer instructions.
Best fit-first use case for this role
Use the rigid steel clamp-on role for comparison when:
- the desk edge can accept clamps;
- the desktop thickness is inside the published range;
- the buyer wants a rigid tray geometry;
- the tray’s published footprint and drop fit the underside zone;
- the power strip and cable bundle can be verified against the real tray space;
- the user’s leg and accessory clearance remain workable.
That is a conditional fit role, not a universal recommendation.
What remains buyer-specific or unknown
The reviewed manufacturer information does not establish universal:
- clamp-zone compatibility;
- desk-frame clearance;
- power-strip fit;
- cable-bundle capacity by volume;
- plug egress;
- leg clearance;
- coexistence with a keyboard tray or monitor-arm clamp;
- no-damage installation.
Keep those fields open until the actual desk is measured.
2. VIVO DESK-AC16F-C — Flexible Fabric Clamp-On Role With Two Height Settings
Official product page: https://vivo-us.com/products/desk-ac16f-c
What This Role Adds
The DESK-AC16F-C changes both the tray material and the vertical-installation decision.
Manufacturer-published facts include:
- mounting: clamp-on;
- materials: steel / plastic / Oxford fabric;
- compatible desktop thickness: 0.4–2 inches;
- tray dimensions: 15.7 × 5.5 × 5 inches;
- total dimensions: 15.7 × 6 × 8.75 or 9.75 inches;
- bracket clearance: 5.5 inches;
- published under-desk clearance: 6.25–9.25 inches;
- weight capacity: 11 lb;
- height settings: 2;
- included accessories: straps and cable clips.
The buyer job here is not simply “fabric vs. steel.”
The key difference is that the two height settings change the vertical relationship between tray, desk, cables, and the user’s legs.
Use both height settings as separate fit states
A two-position bracket creates two possible configurations.
Do not assume the lower or higher position is automatically better.
A lower tray position can increase separation from underside hardware but consume more leg space.
A higher position may preserve more leg clearance but create a tighter relationship with a desk frame, plug body, or cable bend.
The published total heights of 8.75 or 9.75 inches and published under-desk clearance of 6.25–9.25 inches should be treated as manufacturer planning information, not a universal final drop for every desk.
Bracket clearance is a real installation gate
The reviewed manufacturer information includes 5.5 inches of bracket clearance.
That dimension should be compared with the actual desk structure.
A desk frame, rail, or drawer can make a theoretically compatible desktop thickness irrelevant if the bracket cannot occupy the required zone.
Included straps and clips do not prove complete cable fit
The manufacturer includes straps and cable clips.
Those are cable-management accessories, not proof that every power strip or cable bundle will fit.
The buyer still needs to check:
- power-strip dimensions;
- transformer blocks;
- number of cables;
- where cables exit;
- whether the fabric tray deforms under the chosen load in a way that changes clearance;
- whether plugs remain accessible for the intended setup.
This guide does not infer unsupported performance from the inclusion of straps or clips.
Best fit-first use case for this role
Use the flexible two-height role for comparison when:
- the desk edge supports a clamp-on installation;
- desktop thickness is inside the published range;
- the buyer needs a choice between two vertical positions;
- the bracket clearance can be verified;
- the chosen position does not create a leg or hardware collision;
- the real power strip and cable bundle fit the usable tray volume.
What remains buyer-specific or unknown
The reviewed manufacturer information does not establish universal:
- best height setting;
- exact final drop on every desk;
- power-strip fit;
- cable-bundle volume fit;
- leg clearance;
- compatibility with desk frames, keyboard trays, or monitor-arm clamps;
- damage-free clamping.
Those remain installation-specific checks.
3. VIVO DESK-AC06-1C — Screw-Mounted Metal Tray Role
Selected product source: https://vivo-us.com/products/desk-ac06-2c
Source-identity note: the reviewed source URL path contains DESK-AC06-2C, while the selected/displayed SKU reviewed in this guide is DESK-AC06-1C. The URL path and selected SKU are different identifiers; do not treat them as interchangeable.
What This Role Adds
The DESK-AC06-1C is the screw-mounted role in this comparison.
Manufacturer-published facts include:
- mounting: screw-mounted;
- manufacturer-stated supported desk material: wood or particle board / MDF;
- numeric desktop-thickness limit: unknown in the reviewed manufacturer information;
- material: metal;
- dimensions: 16.5 × 3 × 4.5 inches;
- mounting holes: 11 inches apart;
- weight capacity: 11 lb;
- mounting screws and instructions: included.
This role removes the clamp from the decision but adds a fastener-and-desk-structure decision.
“Supported desk material” does not prove every desk location is suitable
The manufacturer-stated material boundary is useful.
It does not establish:
- the exact required desktop thickness;
- the required pilot-hole diameter or depth;
- fastener engagement in the buyer’s exact desk;
- clearance from hidden rails or hardware;
- suitability near desk edges;
- no-damage installation.
Those details must come from the current installation instructions and the actual desk.
Do not infer missing fastener geometry from the included screws.
Use the 11-inch mounting-hole spacing as a real underside check
The mounting holes are published as 11 inches apart.
That gives the buyer a concrete layout dimension to compare against the underside.
Mark the intended positions before drilling or fastening.
Then check whether those points conflict with:
- a metal crossbar;
- drawer rail;
- standing-desk hardware;
- cable channel;
- keyboard tray track;
- monitor-arm clamp plate;
- another under-desk accessory.
A 16.5-inch tray body does not prove that the 11-inch fastener pattern has a usable installation line.
Numeric desktop-thickness limit stays unknown
The reviewed source set does not establish a numeric thickness limit for DESK-AC06-1C.
Do not borrow a clamp-on thickness range from another product.
Do not infer a minimum safe thickness from screw length without manufacturer evidence.
For this role, the buyer should verify the exact current installation instructions against the actual desk construction before treating the tray as qualified.
Best fit-first use case for this role
Use the screw-mounted role for comparison when:
- the buyer wants a non-clamp installation;
- the desk material falls inside the manufacturer-stated supported materials;
- the exact installation instructions can be checked;
- the 11-inch hole pattern has a clear fastening zone;
- the buyer accepts the implications of a screw-mounted installation;
- the tray geometry and leg clearance work after placement.
What remains buyer-specific or unknown
The reviewed manufacturer information leaves these fields open where applicable:
- numeric desk-thickness requirement;
- pilot-hole requirements;
- fastener engagement depth;
- exact screw-placement boundary;
- structural suitability of the exact desk location;
- power-strip fit;
- plug egress;
- leg clearance;
- coexistence with other under-desk hardware.
Unknown remains unknown until verified.
4. IKEA FÖRSÄSONG 005.731.88 — Compact Clamp-On Role
Official product page: https://www.ikea.com/us/en/p/foersaesong-cable-management-tray-white-00573188/
What This Role Adds
FÖRSÄSONG is the compact clamp-on role in this comparison.
Manufacturer-published facts include:
- article number: 005.731.88;
- color: white;
- mounting: clamp-on;
- material: steel / powder coating;
- compatible desktop thickness: 5/8–1 5/8 inches;
- width: 15 inches;
- depth: 4.25 inches;
- height: 6.75 inches;
- maximum load: 7 lb;
- included: 2 touch-and-close fastenings.
Its published dimensions are smaller than some of the VIVO examples, but a smaller tray is not automatically a better small-desk fit.
The buyer still needs enough room for the actual power strip and cable bundle.
Compact dimensions can solve one problem and create another
A narrower, shallower tray may fit into an underside zone where a larger tray cannot.
But reducing tray size can also reduce the usable volume available for:
- a long power strip;
- large plugs;
- charger bricks;
- excess cable loops;
- multiple cable directions.
That creates a direct trade-off.
Do not interpret “compact” as “fits every small desk” or “fits every small power setup.”
Check the published 7-lb maximum against the real mechanical load
The published maximum load is 7 lb.
The buyer should consider the combined physical weight of the power strip, adapters, and cables placed in the tray.
Again, this is a mechanical load figure.
It is not an electrical rating or an electrical-safety certification for the devices placed inside.
Touch-and-close fastenings are not a universal restraint guarantee
The reviewed manufacturer information includes two touch-and-close fastenings.
They may help organize or restrain items in the intended product setup.
This guide does not infer that they secure every power strip geometry, transformer block, or cable bundle under every orientation.
The buyer should verify the real loaded state.
Best fit-first use case for this role
Use the compact clamp-on role for comparison when:
- the desk thickness is inside the published range;
- the available underside zone is relatively limited;
- the real power strip and cable bundle fit the smaller published tray footprint;
- the clamp zone is clear;
- the 6.75-inch published height works with the user’s leg and hardware clearance;
- the combined mechanical load stays within the published maximum.
What remains buyer-specific or unknown
The reviewed manufacturer information does not establish universal:
- clamp-zone fit;
- power-strip footprint fit;
- plug egress;
- cable-volume fit;
- leg clearance;
- compatibility with keyboard trays or monitor-arm clamps;
- damage-free clamping;
- renter approval.
Those need to be checked on the actual desk.
Collision Check: Cable Tray vs. Under-Desk Keyboard Tray
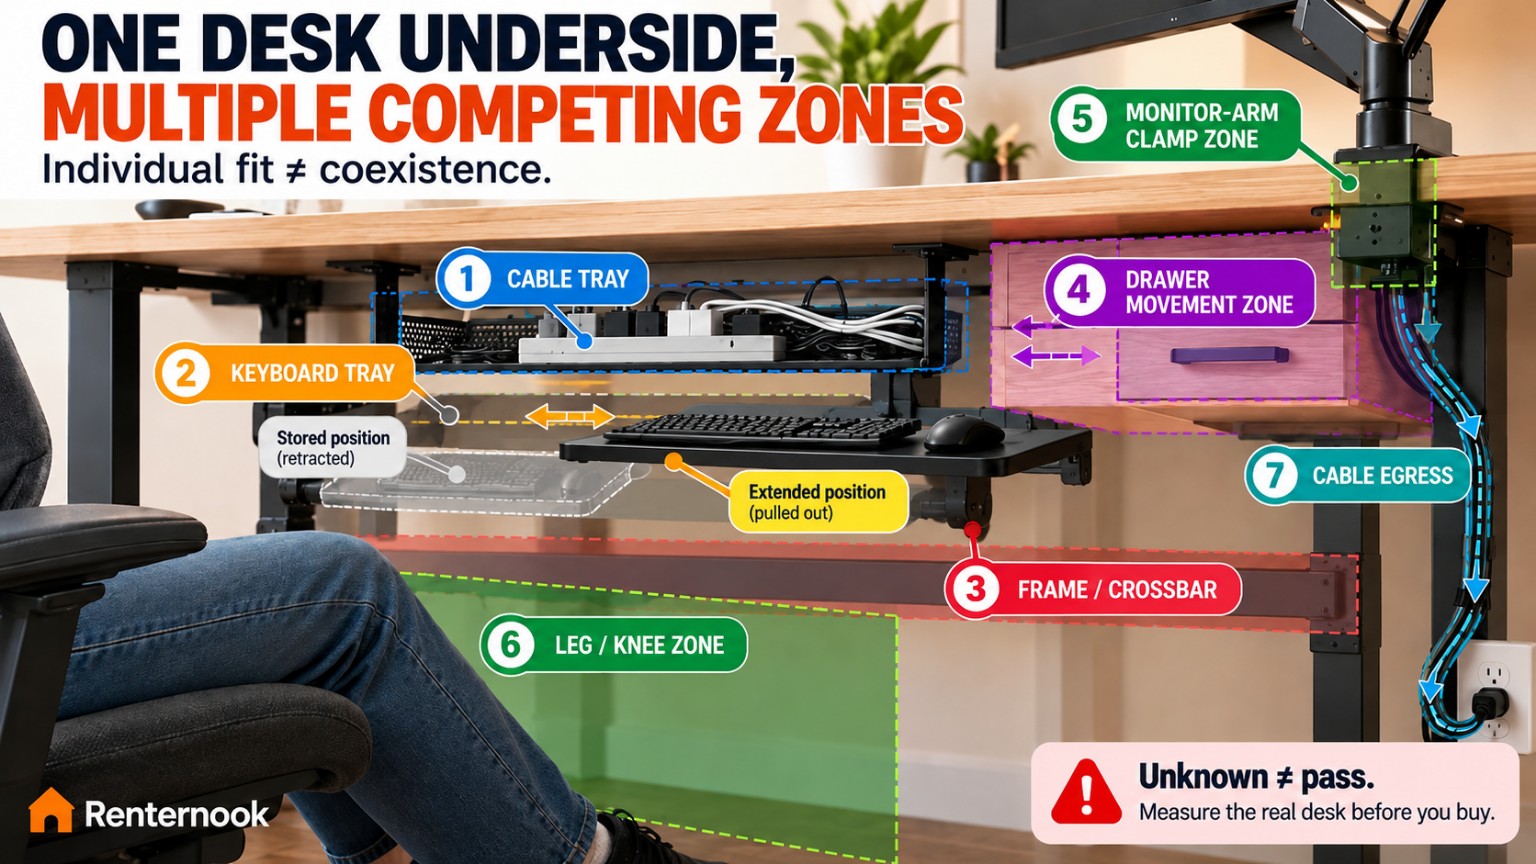
A separate Renternook guide covers under-desk keyboard trays. This guide covers under-desk cable-management trays.
The buyer jobs are different, but the installation zone can be the same.
That means the two accessories can physically interfere even when each one is individually compatible with the desk.
Shared front-edge or underside space
A keyboard tray may use:
- front-edge clamps;
- slider tracks;
- mounting brackets;
- a retract path below the desktop.
A cable-management tray may use:
- edge clamps;
- screw locations;
- a rigid or fabric basket;
- vertical drop below the desk.
If those zones overlap, both products cannot simply be assumed to coexist.
Check the full keyboard-tray movement envelope
A keyboard tray changes position.
Its working and stored states can occupy more underside depth than one static photo suggests.
Before placing a cable tray behind or beside it, verify:
- fully stored keyboard-tray position;
- partially extended state;
- fully extended state;
- clamp locations;
- rail locations;
- any required retract path.
The cable tray must stay clear of every required keyboard-tray state, not just the installed static frame.
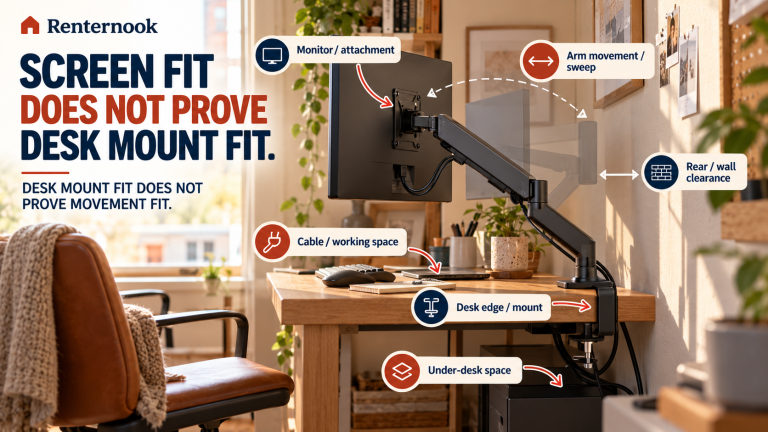
Monitor-arm clamps can use the same edge
A monitor arm may clamp to the rear or side of the desk and extend a lower clamp plate below the surface.
A cable-tray clamp placed on the same edge can collide with that hardware even if both products accept the same desktop thickness.
Measure the horizontal distance between clamp zones rather than assuming they can sit side by side.
Desk frames, crossbars, and drawers remain hard boundaries
A desk frame or crossbar can block:
- the cable-tray body;
- clamp lower plates;
- screw positions;
- cable egress;
- access needed to tighten hardware.
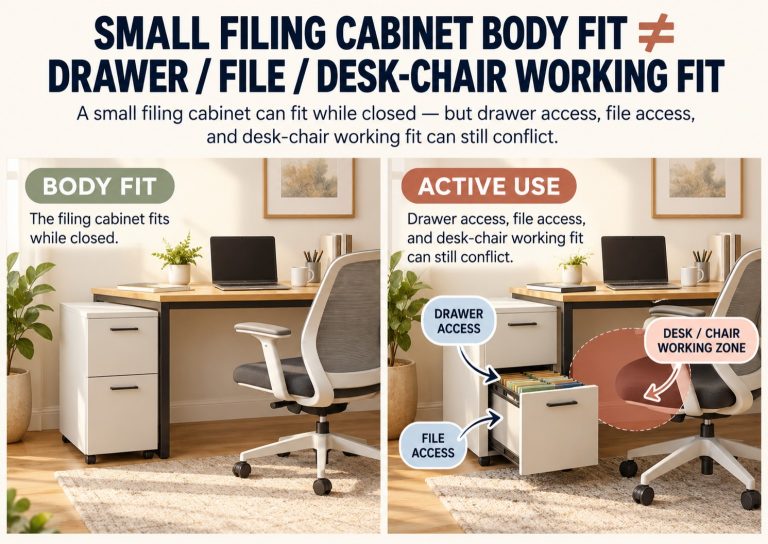
A drawer can create both a physical obstruction and a moving collision zone.
The whole underside needs to be mapped before purchase.
Power Strip Fit: Use a Loaded-Footprint Test
One of the most useful pre-buy checks is to treat the power setup as a physical object.
Do not measure only the bare power strip.
Create the loaded footprint.
Include:
- the power strip body;
- every plug that will normally remain connected;
- large charger bricks;
- side-facing plugs;
- the main power cord where it exits;
- cable bends immediately after the plugs;
- any extra slack you expect to store in the tray.
Then compare that loaded footprint with the tray geometry and the real underside zone.
Why a bare-strip measurement can fail
A 12-inch power strip may fit inside a 15-inch or 17-inch tray body.
But the loaded setup can still exceed the useful space because:
- one transformer extends sideways;
- the main power cord exits at an angle;
- a plug blocks the next receptacle;
- cable loops need more depth;
- the desk frame blocks one egress direction.
The tray must fit the working power arrangement, not just the catalog dimensions of the strip.
Keep unknowns visible
If you cannot verify whether the power strip and loaded plugs fit the actual tray, the correct state is unknown.
Do not convert missing fit evidence into a pass.
Cable Volume: Think in Bundles, Not Cable Counts
Ten thin cables can occupy less space than four thick power and display leads.
So cable count is a weak fit measure by itself.
Instead, look at:
- cable diameter;
- stiffness;
- connector size;
- transformer size;
- bend requirements;
- how much excess length needs to be stored;
- whether cable bundles have to leave from both ends of the tray.
A flexible fabric tray and a rigid steel tray may handle the same cable set differently in practice, but the reviewed manufacturer information does not support universal performance claims between those architectures.
Use the physical bundle and the manufacturer’s instructions as the decision inputs.
Clamp-On vs. Screw-Mounted: Different Trade-Offs
The products compared in this guide gives the buyer two broad mounting paths.
Clamp-on path
Products:
- VIVO DESK-CM6L-B;
- VIVO DESK-AC16F-C;
- IKEA FÖRSÄSONG.
The buyer must verify:
- desktop thickness;
- edge geometry;
- clamp plate clearance;
- desk frame interference;
- nearby clamps;
- loaded tray drop;
- surface suitability.
Clamp-on does not automatically mean renter-safe or damage-free.
Screw-mounted path
Product:
- VIVO DESK-AC06-1C.
The buyer must verify:
- supported desk material;
- current installation instructions;
- exact fastener line;
- hole spacing;
- pilot-hole requirement if any;
- sufficient fastener engagement;
- hidden frame or hardware conflicts;
- the implications of fastening into the desk.
Screw-mounted does not automatically mean more stable, safer, or better.
It is simply a different installation architecture with different evidence requirements.
What to Measure Before You Buy
Use this sequence on the real desk.
A. Draw the underside map
Measure:
- desktop width and depth;
- frame and crossbar positions;
- drawer envelope;
- keyboard-tray rails;
- monitor-arm clamp zones;
- control boxes;
- existing accessories.
A simple underside sketch can prevent buying two products that compete for the same space.
B. Mark the tray body
Use painter’s tape or paper to mark the published width and depth of the candidate tray.
Then estimate the published height or under-desk drop.
Do this in the actual intended location.
C. Mark clamps or screw positions separately
The tray body and mounting hardware do not always occupy the same zone.
For clamp-on products, mark the clamp locations.
For DESK-AC06-1C, mark the 11-inch mounting-hole spacing before treating the tray body as installable.
D. Test the loaded power footprint
Measure the power strip with plugs attached.
Include:
- charger blocks;
- side-facing plugs;
- power cord exit;
- cable bend space.
Do not use bare-strip length alone.
E. Sit at the desk
Check the tray zone against:
- knees;
- thighs;
- chair position;
- chair arms;
- how far forward you sit.
A tray behind the knees can still conflict with the legs when plugs or cable loops hang lower than the tray body.
F. Test cable exit directions
Plan where each cable needs to go after leaving the tray.
Check whether the desk frame, wall, monitor-arm hardware, or keyboard tray blocks the route.
G. Test coexistence
If another under-desk accessory exists, mark both products at the same time.
Do not verify them one at a time and assume the passes add together.
Common Buying Mistakes
Mistake 1: Choosing by tray width alone
Width does not prove mounting fit, vertical clearance, or loaded power-strip fit.
Mistake 2: Measuring desktop thickness but ignoring the frame
A clamp can accept the desktop thickness and still have nowhere to sit because a steel rail or apron blocks the lower clamp plate.
Mistake 3: Assuming the tray will fit the power strip because the strip is shorter
Plug bodies, transformers, and cable exits can turn a shorter strip into a larger loaded footprint.
Mistake 4: Treating load capacity as cable volume
An 11-lb capacity does not tell you whether the tray has enough usable volume for the bundle.
Mistake 5: Treating mechanical load capacity as an electrical rating
They are different questions.
Use the electrical device manufacturer’s guidance for electrical safety and device limits.
Mistake 6: Ignoring the user’s legs
The tray, plugs, and cable loops can reduce usable knee or thigh space.
Mistake 7: Forgetting keyboard-tray movement
A keyboard tray can retract into the same underside volume where a cable tray appears to fit when the keyboard tray is extended.
Mistake 8: Assuming clamp-on means renter-safe
A clamp can leave marks, compress a surface, or violate rules for furnished property depending on the desk and agreement.
This article makes no universal renter-safe or no-damage claim.
Mistake 9: Assuming screw-mounted means the desk is suitable
Manufacturer-stated material compatibility does not prove every desk thickness, edge location, or internal construction is suitable for fasteners.
Mistake 10: Treating missing dimensions as zero
Unknown is not zero.
Unknown is not pass.
Unknown is not fail.
If a fit-critical value is not established, verify it before buying.
Renter and Desk-Damage Considerations
Under-desk cable management is often marketed as a low-visibility improvement, but installation still changes how hardware contacts the desk.
Clamp-on products
Before installation, verify:
- desk ownership;
- surface finish;
- clamp-pad or contact-point instructions;
- maximum and minimum desk thickness;
- whether the desk edge is structurally suitable;
- furnished-unit or lease rules if applicable.
Do not infer “no drilling” equals “no damage.”
Screw-mounted products
A screw-mounted tray creates a different decision.
Before installation, verify:
- desk ownership;
- permission to fasten into the desk;
- manufacturer-supported desk construction;
- exact mounting instructions;
- screw placement and engagement;
- any pilot-hole requirement.
This guide does not make a universal renter-safe claim for either mounting path.
Which Product Role Matches the Uncertainty You Need to Solve?
This is not a winner-and-runner-up list.
Use the product role that helps you resolve the actual installation uncertainty.
VIVO DESK-CM6L-B role
Useful when you need:
- a rigid steel clamp-on architecture;
- a published 0.2–2-inch desktop-thickness range;
- a 17 × 6-inch tray footprint to compare with a loaded power setup;
- an 11-lb published mechanical capacity.
Primary buyer question:
Does the rigid tray and its clamp hardware fit the exact desk edge, underside structure, loaded power setup, and leg zone?
VIVO DESK-AC16F-C role
Useful when you need:
- a clamp-on design with two height settings;
- published bracket-clearance and under-desk-clearance information;
- a flexible fabric tray architecture;
- included straps and cable clips.
Primary buyer question:
Which height setting, if either, works with the desk frame, power-strip footprint, cable bundle, and actual leg clearance?
VIVO DESK-AC06-1C role
Useful when you need:
- a screw-mounted metal tray;
- a published 11-inch mounting-hole spacing;
- a non-clamp installation role;
- manufacturer-stated support for wood or particle board / MDF.
Primary buyer question:
Can the exact desk construction and fastener zone be verified from the current instructions without inventing a missing thickness or pilot-hole requirement?
IKEA FÖRSÄSONG role
Useful when you need:
- a more compact published tray footprint;
- a clamp-on installation;
- a 5/8–1 5/8-inch published desk-thickness range;
- a 7-lb published maximum load.
Primary buyer question:
Does the smaller tray actually fit the loaded power strip and cable bundle while preserving clamp and leg clearance?
Final Fit-First Decision
For a small desk, an under-desk cable management tray should pass five different layers.
1. Mounting fit
The exact desk thickness, material, edge, and mounting method work together.
2. Hardware fit
Clamps or fasteners have a real installation zone that is not blocked by a frame, crossbar, drawer, monitor-arm clamp, keyboard tray, or other hardware.
3. Load fit
The actual power strip, plugs, cable bundle, and excess cable volume fit the tray without relying on a bare-strip measurement or unsupported assumption.
4. Clearance fit
The tray and loaded cables leave enough usable space for the user’s legs, chair, and other moving accessories.
5. Working-system fit
The cables can enter and leave the tray in the directions required by the real workstation, and the installation can coexist with the rest of the desk system.
The four products compared in this guide represent different ways to solve that problem:
- VIVO DESK-CM6L-B — rigid steel clamp-on role;
- VIVO DESK-AC16F-C — flexible clamp-on role with two height settings;
- VIVO DESK-AC06-1C — screw-mounted metal role;
- IKEA FÖRSÄSONG — compact clamp-on role.
None receives a universal fit claim.
None receives a universal power-strip-fit claim.
None receives a universal leg-clearance claim.
None receives an automatic renter-safe or no-damage claim.
The correct buying sequence is simple:
map the underside → choose the mounting method → verify the desk boundary → mark the tray and clamp/fastener zone → measure the loaded power setup → check cable exits → test leg and accessory clearance → buy only after the real installation zone passes.
That is the Fit-First decision.
Sources and Methodology
Renternook did not physically test these products. Product-specific claims in this guide use first-party manufacturer sources reviewed for this guide.
VIVO DESK-CM6L-B
Official product page:
https://vivo-us.com/products/desk-cm6l-b
Product role:
Rigid steel clamp-on.
VIVO DESK-AC16F-C
Official product page:
https://vivo-us.com/products/desk-ac16f-c
Product role:
Flexible fabric clamp-on with two height settings.
VIVO DESK-AC06-1C
Verified source page:
https://vivo-us.com/products/desk-ac06-2c
Selected/displayed SKU:
DESK-AC06-1C
The URL path contains DESK-AC06-2C, while the selected/displayed SKU is DESK-AC06-1C. Check the selected variant rather than assuming the URL path identifies the same SKU.
IKEA FÖRSÄSONG 005.731.88
Official product page:
https://www.ikea.com/us/en/p/foersaesong-cable-management-tray-white-00573188/
Product role:
Compact clamp-on.
Evidence boundaries
- Unknown fit-critical values remain unknown.
- Product weight capacities are treated as mechanical load facts, not electrical ratings.
- This guide does not claim universal desk fit, power-strip fit, leg clearance, coexistence, renter safety, or damage-free installation.
- Keyboard trays and cable-management trays solve different tasks, but their under-desk installation zones can collide.